Spring Security - OAuth 2: 승인 코드 그랜트 유형을 이용한 간단한 SSO App 구현
in DEV on SpringSecurity, Oauth2, Client-registration, Client-registration-repository
이 포스트에서는 스프링 시큐리티로 클라이언트를 구현하는 법에 대해 알아본다.
- SSO (Single Sign-On) 을 이용하는 OAuth 2 App 구현
이번에 구축하는 애플리케이션은 OAuth 2 의 클라이언트 역할을 한다.
깃허브를 권한 부여 및 리소스 서버로 이용하고 구성 요소와 승인 코드 그래트 유형 간의 통신에 대해 알아본다.
목차
- 1. 권한 부여 서버 관리
- 2. 종속성, 엔드포인트, 구성 클래스 구현
- 3.
ClientRegistration구현 - 4.
ClientRegistrationRepository구현 - 5.
ClientRegistration와ClientRegistrationRepository을 스프링 부트 구성으로 구현 - 6. 인증된 사용자의 세부 정보 조회
- 7. 테스트
- 마치며…
- 참고 사이트 & 함께 보면 좋은 사이트
개발 환경
- 언어: java
- Spring Boot ver: 3.2.3
- Spring ver: 6.1.4
- Spring Security ver: 6.2.2
- IDE: intelliJ
- SDK: JDK 17
- 의존성 관리툴: Maven
1. 권한 부여 서버 관리
권한 부여 서버 구현은 Spring Security - OAuth 2(2): 권한 부여 서버 구현 을 참고하세요.
3.1. 승인 코드 그랜트 유형 에서 본 것처럼 클라이언트가 액세스 토큰을 발급받기 위해서는 클라이언트의 자격 증명인 클라이언트 ID 와 암호가 필요하므로 OAuth 애플리케이션을 깃허브 권한 부여 서버에 등록해야 한다.
아래 주소로 접속하여 애플리케이션을 등록한다.
https://github.com/settings/applications/new
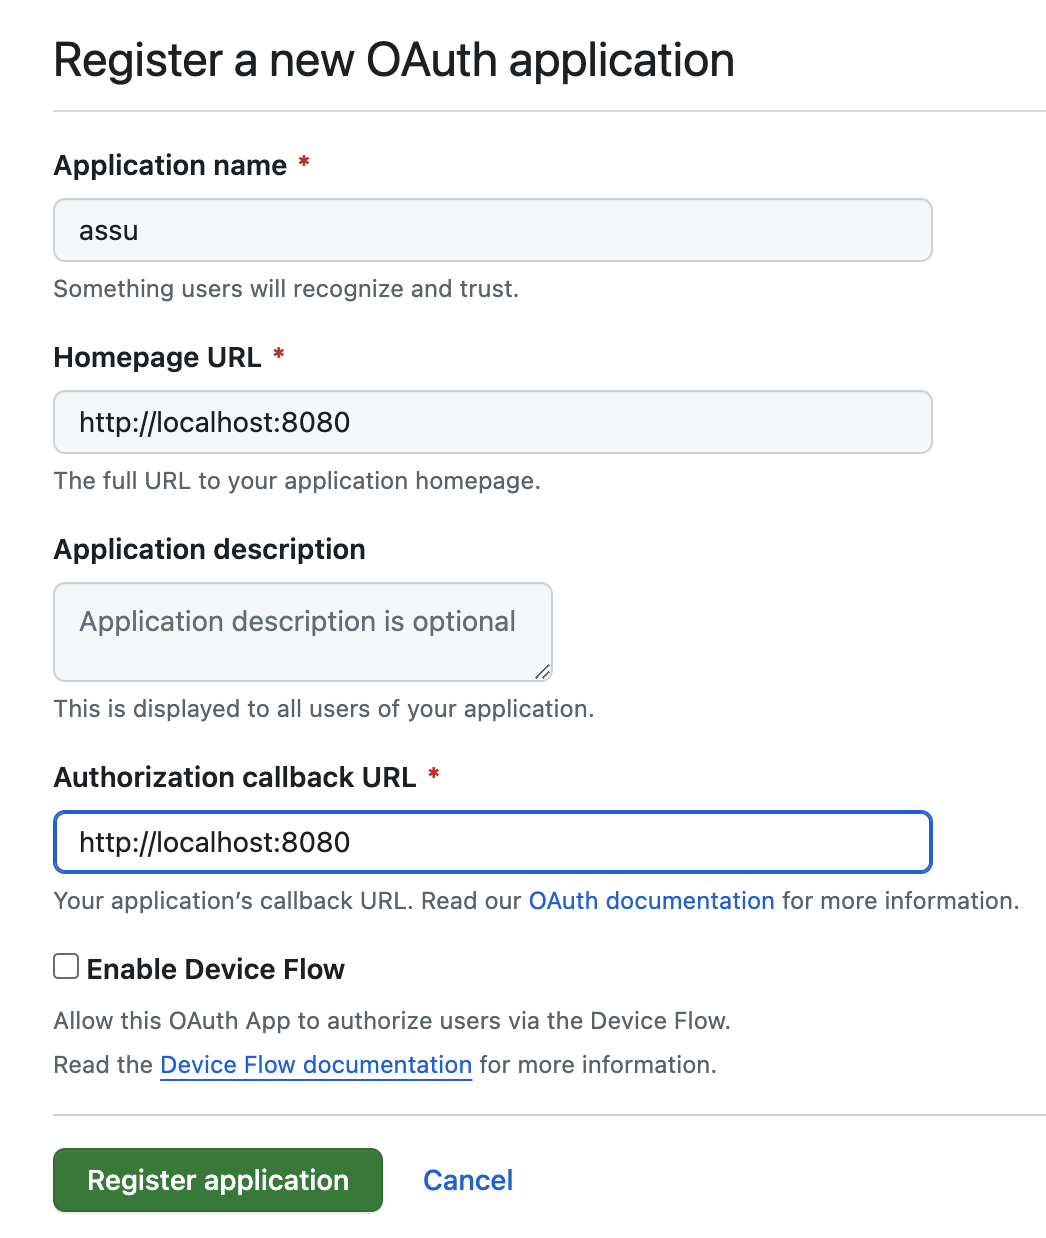
등록하고 나면 Client ID 와 Client secrets 가 발급된다.
아래 클라이언트 자격 증명은 본 포스팅 이후 삭제 예정임
- Client ID: be4d2d061d05e9aed30a
- Client secrets: 3a3b00faf240377a9630d085ac742e3efc8293e6
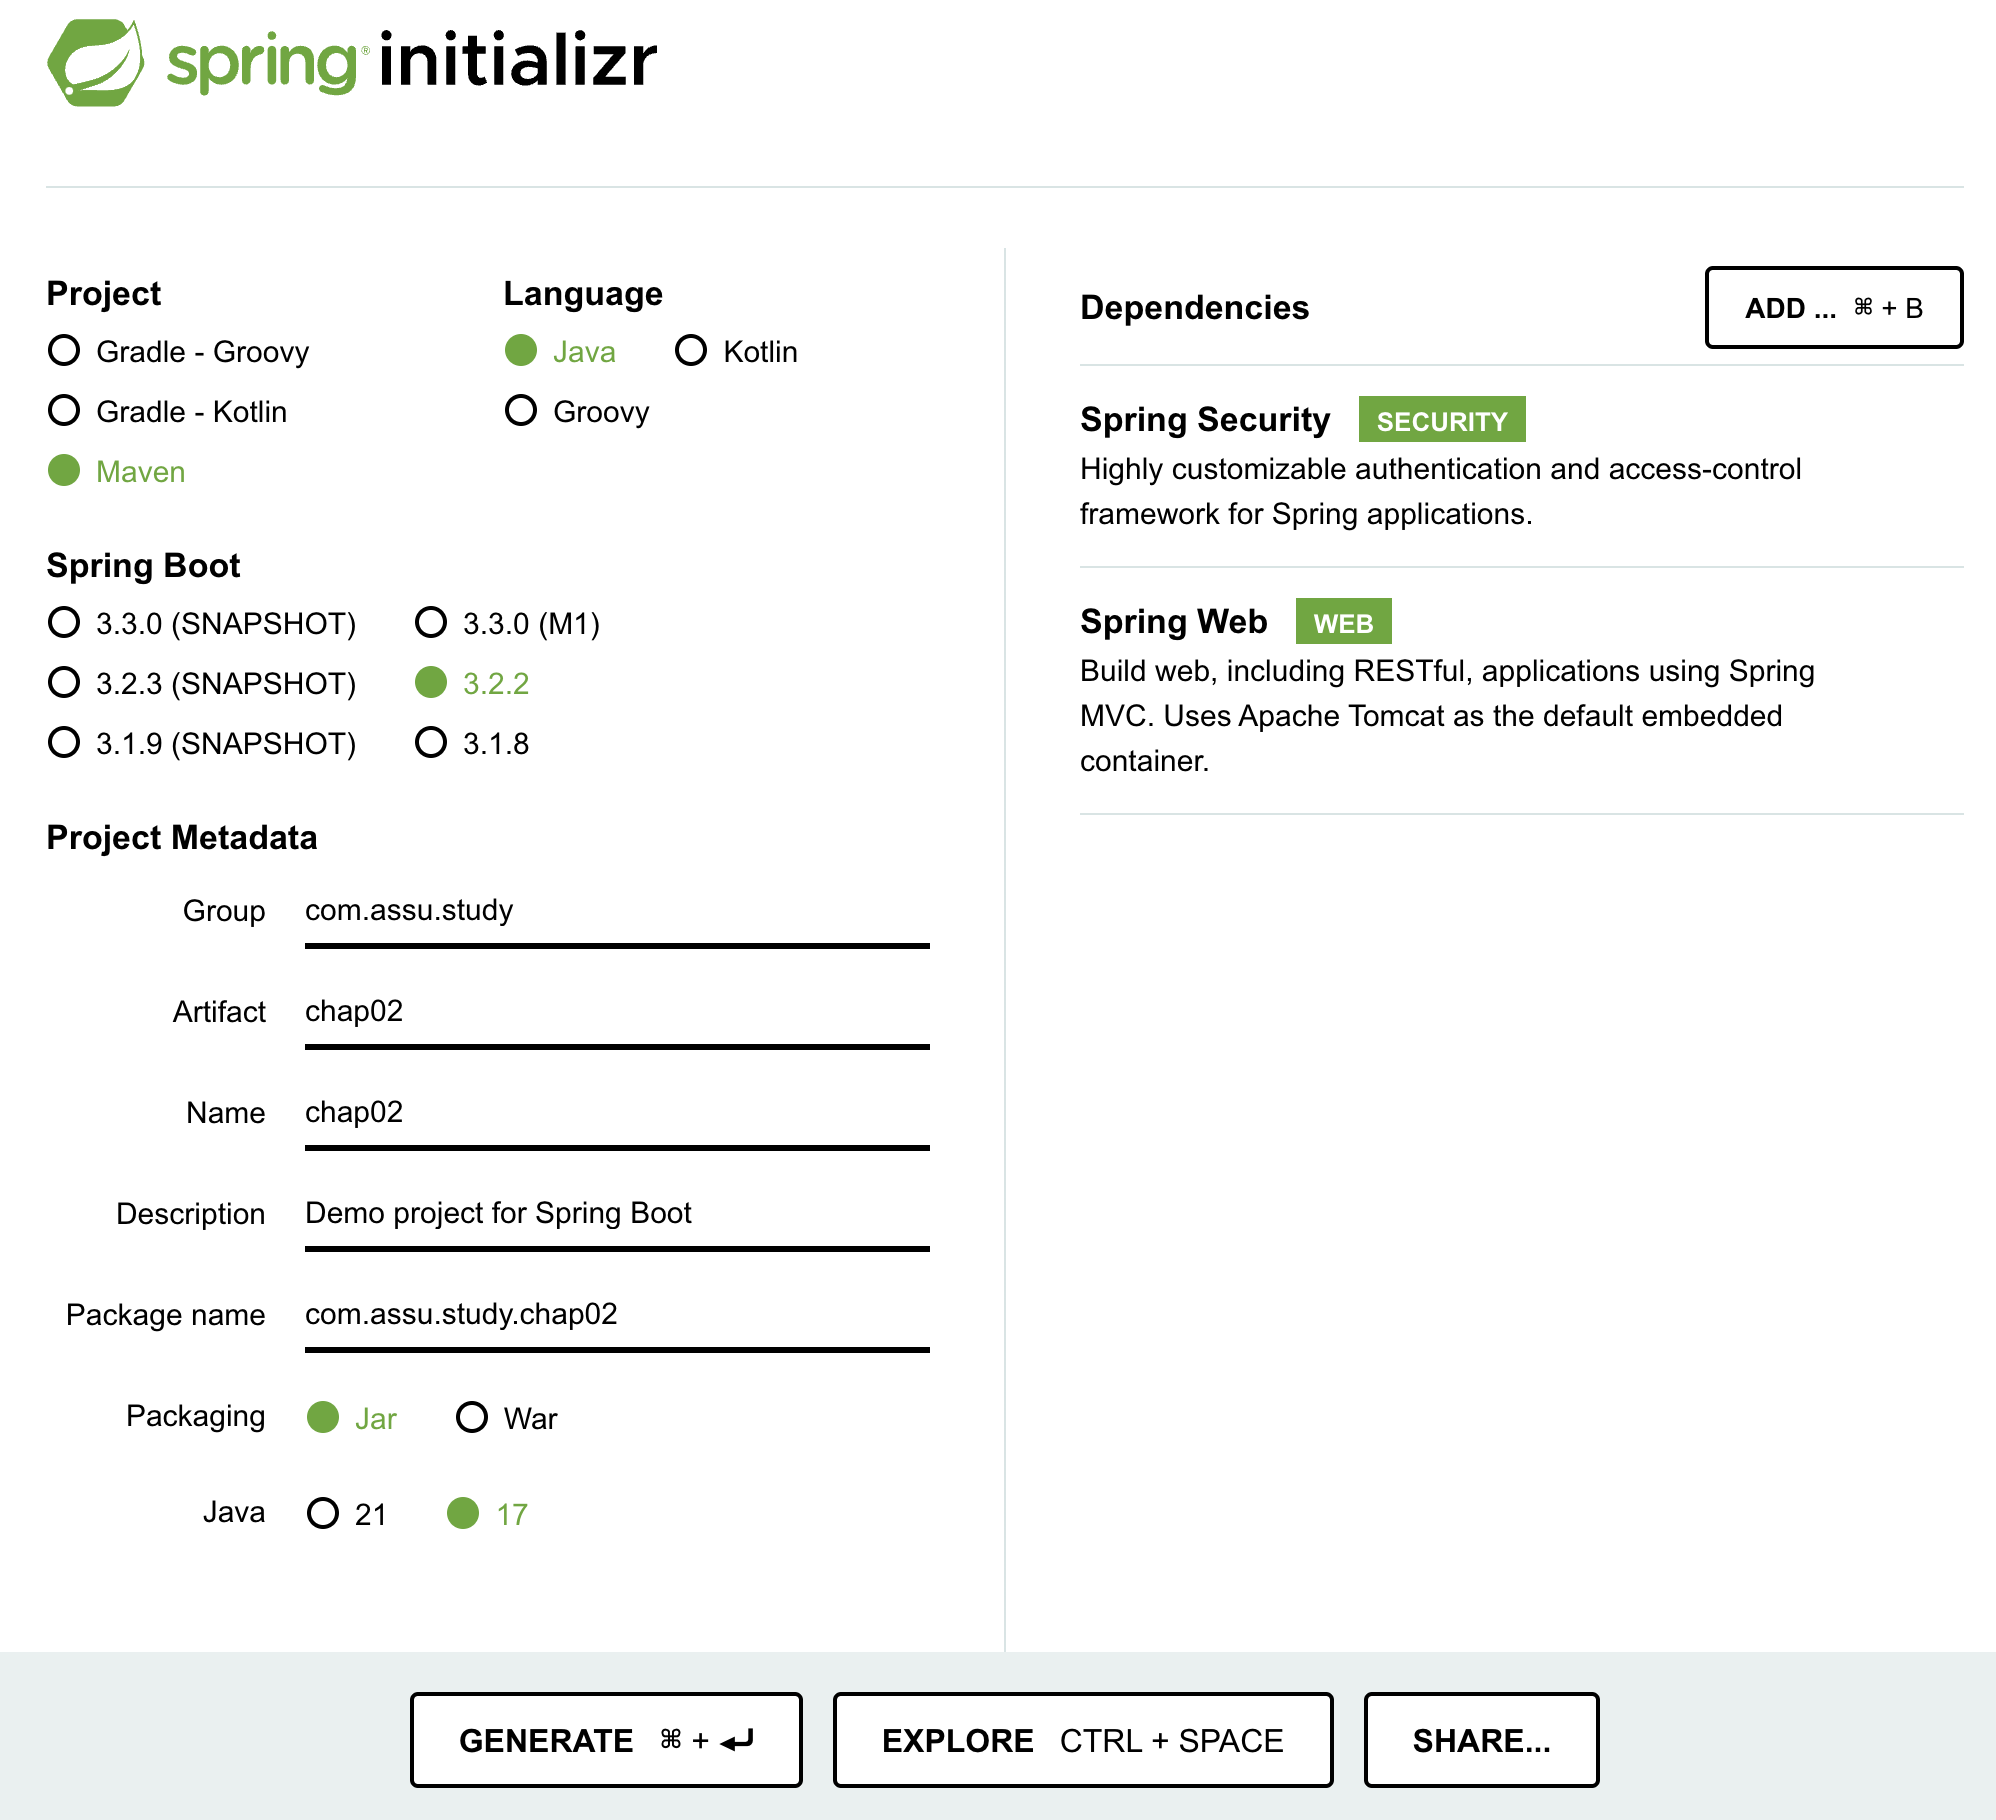
2. 종속성, 엔드포인트, 구성 클래스 구현
소스는 github 에 있습니다.
pom.xml
<?xml version="1.0" encoding="UTF-8"?>
<project xmlns:xsi="http://www.w3.org/2001/XMLSchema-instance" xmlns="http://maven.apache.org/POM/4.0.0"
         xsi:schemaLocation="http://maven.apache.org/POM/4.0.0 https://maven.apache.org/xsd/maven-4.0.0.xsd">
    <modelVersion>4.0.0</modelVersion>
    <parent>
        <groupId>org.springframework.boot</groupId>
        <artifactId>spring-boot-starter-parent</artifactId>
        <version>3.2.3</version>
        <relativePath/> <!-- lookup parent from repository -->
    </parent>
    <groupId>com.assu.study</groupId>
    <artifactId>chap1201</artifactId>
    <version>0.0.1-SNAPSHOT</version>
    <name>chap1201</name>
    <description>chap1201</description>
    <properties>
        <java.version>17</java.version>
    </properties>
    <dependencies>
        <dependency>
            <groupId>org.springframework.boot</groupId>
            <artifactId>spring-boot-starter-oauth2-client</artifactId>
        </dependency>
        <dependency>
            <groupId>org.springframework.boot</groupId>
            <artifactId>spring-boot-starter-security</artifactId>
        </dependency>
        <dependency>
            <groupId>org.springframework.boot</groupId>
            <artifactId>spring-boot-starter-web</artifactId>
        </dependency>

        <dependency>
            <groupId>org.springframework.boot</groupId>
            <artifactId>spring-boot-starter-test</artifactId>
            <scope>test</scope>
        </dependency>
        <dependency>
            <groupId>org.springframework.security</groupId>
            <artifactId>spring-security-test</artifactId>
            <scope>test</scope>
        </dependency>
        <dependency>
            <groupId>org.projectlombok</groupId>
            <artifactId>lombok</artifactId>
            <scope>annotationProcessor</scope>
        </dependency>
    </dependencies>

    <build>
        <plugins>
            <plugin>
                <groupId>org.springframework.boot</groupId>
                <artifactId>spring-boot-maven-plugin</artifactId>
            </plugin>
        </plugins>
    </build>

</project>
/static/main.html
Hello~
이제 애플리케이션이 깃허브에서 로그인을 이용할 수 있도록 보안 구성을 한다.
httpBasic() 이나 formLogin() 이 아닌 oauth2Ligin() 을 호출하여 필터 체인에 인증 필터를 추가한다.
1. 스프링 시큐리티 아키텍처의 필터 개념 에서 본 것처럼 스프링 시큐리티에는 여러 필터 구현이 있는데 oauth2Login() 메서드를 호출하면 프레임워크는 OAuth2LoginAuthenticationFilter 를 필터 체인에 추가한다.
이 필터는 요청을 가로채서 OAuth 2 인증에 필요한 논리를 적용한다.

/config/ProjectConfig.java
import org.springframework.context.annotation.Bean;
import org.springframework.context.annotation.Configuration;
import org.springframework.security.config.Customizer;
import org.springframework.security.config.annotation.web.builders.HttpSecurity;
import org.springframework.security.web.SecurityFilterChain;
import org.springframework.security.web.authentication.www.BasicAuthenticationFilter;

@Configuration
public class ProjectConfig {
  @Bean
  public SecurityFilterChain filterChain(HttpSecurity http) throws Exception {
    http
        .oauth2Login(Customizer.withDefaults()) // 인증 메서드 추가
        .authorizeHttpRequests(authz -> authz.anyRequest().authenticated());  // 모든 요청이 인증되게 함

    return http.build();
  }
}
3. ClientRegistration 구현
OAuth 2 클라이언트와 권한 부여 서버 간의 연결을 구현한다.
모든 요청에 대해 사용자가 인증을 해야한다고 지정했지만 인증 방법을 제공하지 않았기 때문에 지금 이 상태로는 메인 페이지에 접근할 수 없다.
깃허브가 권한 부여 서버임을 설정해야 하는데, 스프링 시큐리티는 이 때 이용할 수 있는 ClientRegistration 계약을 정의한다.
ClientRegistration 인터페이스는 OAuth 2 아키텍처의 클라이언트를 나타내며, 아래와 같은 클라이언트 세부 정보를 정의해야 한다.
- 클라이언트 ID 와 비밀
- 인증에 이용되는 그랜트 유형
- 리디렉션 URI
- scope
/config/ProjectConfig.java
import org.springframework.context.annotation.Configuration;
import org.springframework.security.oauth2.client.registration.ClientRegistration;
import org.springframework.security.oauth2.core.AuthorizationGrantType;

@Configuration
public class ProjectConfig {

  // ...

  // 복잡해서 사용하지 않을 예정인 코드
  private ClientRegistration clientRegistration() {
    ClientRegistration cr = ClientRegistration.withRegistrationId("github")
        .clientId("be4d2d061d05e9aed30a")
        .clientSecret("3a3b00faf240377a9630d085ac742e3efc8293e6")
        .scope("read:user")
        .authorizationUri("https://github.com/login/oauth/authorize") // 클라이언트가 인증을 위해 사용자를 리디렉션하는 URI
        .tokenUri("https://github.com/login/oauth/access_token")  // 액세스 토큰과 갱신 토큰을 얻기 위해 호출하는 URI
        .userInfoUri("https://api.github.com/user") // 클라이언트가 액세스 토큰을 얻은 후 사용자의 세부 정보를 얻기 위해 호출하는 URI
        .userNameAttributeName("id")
        .clientName("GitHub")
        .authorizationGrantType(AuthorizationGrantType.AUTHORIZATION_CODE)
        .redirectUri("{baseUrl}/{action}/oauth2/code/{registrationId}")
        .build();
    return cr;
  }
}
위에 나오는 URI 들은 GitHub Oauth 앱 권한부여 docs 를 통해서 얻을 수 있다.
하지만 스프링 시큐리티는 구글, 깃허브, 페이스북, 옥타 등 일반적인 공급자에 대한 인증에 이용할 수 있는 CommonOAuth2Provider 클래스를 정의한다.
위 코드를 다시 정의하면 아래와 같다.
// ClientRegistration 객체를 반환하는 메서드를 구성 클래스에 추가
private ClientRegistration clientRegistration() {
ClientRegistration cr = CommonOAuth2Provider.GITHUB
    .getBuilder("github") // 클라이언트 등록을 위한 ID 제공
    .clientId("be4d2d061d05e9aed30a")
    .clientSecret("3a3b00faf240377a9630d085ac742e3efc8293e6")
    .build(); // ClientRegistration 인스턴스 생성
return cr;
}
이용하는 권한 부여 서버가 일반적인 공급자가 아니라면 ClientRegistration 을 완전히 정의해야 한다.
CommonOAuth2Provider 를 이용한다는 것은 해당 공급자가 URL 과 다른 값들을 변경하지 않는다는 가정하에 이용하는 것이다.
그럴 가능성은 거의 없지만 만에 하나라도 그런 상황을 피하고 싶으면 ClientRegistration 을 완전히 정의해야 한다.
4. ClientRegistrationRepository 구현
스프링 시큐리티가 인증을 위해 ClientRegistration 객체를 스프링 컨텍스트에 추가하는 법에 대해 알아본다.
ClientRegistration 계약을 구현하여 스프링 시큐리티에 OAuth 2 클라이언트를 나타내었으니 인증에 이용하도록 설정해야 한다.
이 때 스프링 시큐리티는 ClientRegistrationRepository 형식의 객체를 이용한다.
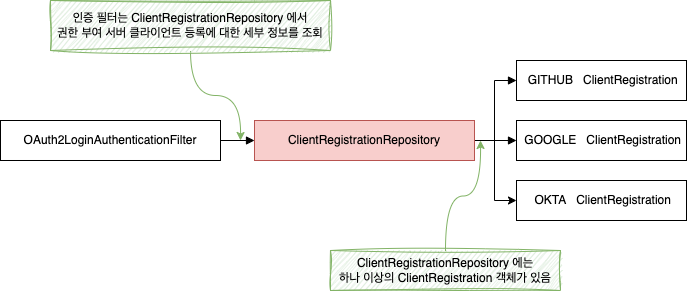
UserDetailsService 객체가 사용자 이름으로 UserDetails 를 찾는 것처럼 ClientRegistrationRepository 객체는 등록 ID 로 ClientRegistration 을 찾는다.
ClientRegistrationRepository 인터페이스를 구현해서 ClientRegistration 인스턴스를 찾을 위치는 프레임워크에 알릴 수 있는데, 스프링 시큐리티는 ClientRegistration 인스턴스를 메모리에 저장하는 ClientRegistrationRepository 의 구현인 InMemoryClientRegistrationRepository 를 제공한다.
이제 InMemoryClientRegistrationRepository 구현을 이용하는 ClientRegistrationRepository 를 정의하고 스프링 컨텍스트에 빈으로 등록한다.
/config/ProjectConfig.java
import org.springframework.context.annotation.Bean;
import org.springframework.context.annotation.Configuration;
import org.springframework.security.config.Customizer;
import org.springframework.security.config.annotation.web.builders.HttpSecurity;
import org.springframework.security.config.oauth2.client.CommonOAuth2Provider;
import org.springframework.security.oauth2.client.registration.ClientRegistration;
import org.springframework.security.oauth2.client.registration.ClientRegistrationRepository;
import org.springframework.security.oauth2.client.registration.InMemoryClientRegistrationRepository;
import org.springframework.security.web.SecurityFilterChain;

@Configuration
public class ProjectConfig {

  @Bean // ClientRegistrationRepository 형식의 빈을 스프링 컨텍스트에 추가, 이 빈에 ClientRegistration 에 대한 참조가 있음
  public ClientRegistrationRepository clientRegistrationRepository() {
    ClientRegistration cr = clientRegistration();

    // ClientRegistration 인스턴스는 매개변수로 하여 생성
    return new InMemoryClientRegistrationRepository(cr);
  }

  // ClientRegistration 객체를 반환하는 메서드를 구성 클래스에 추가
  private ClientRegistration clientRegistration() {
    ClientRegistration cr = CommonOAuth2Provider.GITHUB
        .getBuilder("github") // 클라이언트 등록을 위한 ID 제공
        .clientId("be4d2d061d05e9aed30a")
        .clientSecret("3a3b00faf240377a9630d085ac742e3efc8293e6")
        .build(); // ClientRegistration 인스턴스 생성
    return cr;
  }

  // 복잡해서 사용하지 않을 예정인 코드
//  private ClientRegistration clientRegistration() {
//    ClientRegistration cr = ClientRegistration.withRegistrationId("github")
//        .clientId("be4d2d061d05e9aed30a")
//        .clientSecret("3a3b00faf240377a9630d085ac742e3efc8293e6")
//        .scope("read:user")
//        .authorizationUri("https://github.com/login/oauth/authorize") // 클라이언트가 인증을 위해 사용자를 리디렉션하는 URI
//        .tokenUri("https://github.com/login/oauth/access_token")  // 액세스 토큰과 갱신 토큰을 얻기 위해 호출하는 URI
//        .userInfoUri("https://api.github.com/user") // 클라이언트가 액세스 토큰을 얻은 후 사용자의 세부 정보를 얻기 위해 호출하는 URI
//        .userNameAttributeName("id")
//        .clientName("GitHub")
//        .authorizationGrantType(AuthorizationGrantType.AUTHORIZATION_CODE)
//        .redirectUri("{baseUrl}/{action}/oauth2/code/{registrationId}")
//        .build();
//    return cr;
//  }

  @Bean
  public SecurityFilterChain filterChain(HttpSecurity http) throws Exception {
    http
        .oauth2Login(Customizer.withDefaults()) // 인증 메서드 추가
        .authorizeHttpRequests(authz -> authz.anyRequest().authenticated());  // 모든 요청이 인증되게 함

    return http.build();
  }
}
ClientREgistrationRepository 를 등록하는 다른 방법으로는 HttpSecurity 객체의 oauth2Login() 메서드의 매개 변수로 Customizer 객체를 이용하는 방법도 있다.
어떤 방법을 사용해도 상관없지만 구성 방식을 혼용하는 것은 좋지 않으므로 컨텍스트에서 빈으로 설정 vs 코드 인라인 구성 중 하나를 선택하여 이용하는 것이 좋음
public ClientRegistrationRepository clientRegistrationRepository() {
ClientRegistration cr = clientRegistration();

// ClientRegistration 인스턴스는 매개변수로 하여 생성
return new InMemoryClientRegistrationRepository(cr);
}

// ClientRegistration 객체를 반환하는 메서드를 구성 클래스에 추가
private ClientRegistration clientRegistration() {
ClientRegistration cr = CommonOAuth2Provider.GITHUB
    .getBuilder("github") // 클라이언트 등록을 위한 ID 제공
    .clientId("be4d2d061d05e9aed30a")
    .clientSecret("3a3b00faf240377a9630d085ac742e3efc8293e6")
    .build(); // ClientRegistration 인스턴스 생성
return cr;
}

@Bean
public SecurityFilterChain filterChain(HttpSecurity http) throws Exception {
  http
      .oauth2Login(c -> c.clientRegistrationRepository(clientRegistrationRepository())) // 인증 메서드 추가
      .authorizeHttpRequests(authz -> authz.anyRequest().authenticated());  // 모든 요청이 인증되게 함

  return http.build();
}
5. ClientRegistration 와 ClientRegistrationRepository 을 스프링 부트 구성으로 구현
하나 이상의 인증 공급자를 메모리에 보유하는 것이 끝이면 스프링 부트 구성으로 하는 것이 좋음
만일 DB 에 클라이언트 등록 세부 정보를 저장하거나, 웹 서비스에서 이를 조회하는 등 다른 기능이 필요하다면 4.
ClientRegistrationRepository구현 처럼ClientRegistrationRepository맞춤형 구현을 작성해야 함
위에선 구성 클래스를 통해 ClientRegistration 와 ClientRegistrationRepository 구현하여 인증 구성 요소를 스프링 프레임워크에 등록했는데 스프링 부트에서 제공하는 속성 파일을 이용하여 구성할 수도 있다.
application.properties
spring.security.oauth2.client.registration.github.client-id=be4d2d061d05e9aed30a
spring.security.oauth2.client.registration.github.client-secret=3a3b00faf240377a9630d085ac742e3efc8293e6
공급자 이름이 github 이므로 스프링 부트는 CommonOAuth2Provider 클래스에서 URI 와 관련된 모든 세부 정보를 가져올 수 있다.
ClientRegistration 와 ClientRegistrationRepository 에 대한 세부 정보를 스프링 부트가 속성 파일을 바탕으로 자동으로 생성하기 때문에 직접 지정할 필요가 없다.
import org.springframework.context.annotation.Bean;
import org.springframework.context.annotation.Configuration;
import org.springframework.security.config.Customizer;
import org.springframework.security.config.annotation.web.builders.HttpSecurity;
import org.springframework.security.web.SecurityFilterChain;

@Configuration
public class ProjectConfig2 {

  @Bean
  public SecurityFilterChain filterChain(HttpSecurity http) throws Exception {
    http
        .oauth2Login(Customizer.withDefaults()) // 인증 메서드 추가
        .authorizeHttpRequests(authz -> authz.anyRequest().authenticated());  // 모든 요청이 인증되게 함

    return http.build();
  }
}
만일 일반적인 공급자기 아닌 다른 공급자를 이용한다면 spring.security.oauth2.client.provider 로 시작하는 속성 그룹으로 권한 부여 서버에 관한 세부 정보를 지정한다.
spring.security.oauth2.client.provider.custom_provider.authorization-uri=<https://~~~>
spring.security.oauth2.client.provider.custom_provider.token-uri=<https://~~~>
6. 인증된 사용자의 세부 정보 조회
스프링 시큐리티에서 인증된 사용자의 세부 정보는 SecurityContext 에 저장된다.
인증 프로세스가 끝나면 담당 필터가 Authentication 객체를 SecurityContext 에 저장하는데 이 경우 Authentication 객체의 구현은 OAuth2AuthenticationToken 이다.
이 정보를 조회하는 방법은 SecurityContext 에서 직접 가져오거나, 엔드포인트의 매개 변수에 주입하여 가져올 수 있다.
/controller/HelloController.java
import lombok.extern.slf4j.Slf4j;
import org.springframework.security.core.context.SecurityContext;
import org.springframework.security.core.context.SecurityContextHolder;
import org.springframework.security.oauth2.client.authentication.OAuth2AuthenticationToken;
import org.springframework.stereotype.Controller;
import org.springframework.web.bind.annotation.GetMapping;

@Slf4j
@Controller
public class HelloController {
  @GetMapping("/")
  public String main(OAuth2AuthenticationToken token) {
    log.info("token: " + token);
    log.info("principal: " + token.getPrincipal());


    SecurityContext securityContext = SecurityContextHolder.getContext();
    log.info("securityContext getAuthentication: " + securityContext.getAuthentication());
    log.info("securityContext principal: " + securityContext.getAuthentication().getPrincipal());

    return "main.html";
  }
}
7. 테스트
이 애플리케이션은 깃허브를 권한 부여 서버 및 리소스 서버로 이용하고 있다.
사용자가 로그인하려고 하면 클라이언트는 사용자를 깃허브 로그인 페이지로 리디렉션한다.
사용자가 로그인하면 깃허브는 권한 부여를 제공하고, 애플리케이션을 콜백한다.
애플리케이션은 승인 코드로 액세스 토큰을 요청하고, 깃허브는 액세스 토큰을 제공한다.
애플리케이션은 액세스 토큰을 이용하여 리솟 서버인 깃허브에서 사용자 세부 정보에 접근할 수 있다.
먼저 깃허브를 로그아웃 상태로 만들고 http://localhost:8080 에 접근한다.
그럼 애플리케이션은 아래 주소로 사용자를 리디렉션한다.
https://github.com/login?client_id=be4d2d061d05e9aed30a&return_to=%2Flogin%2Foauth%2Fauthorize%3Fclient_id%3Dbe4d2d061d05e9aed30a%26redirect_uri%3Dhttp%253A%252F%252Flocalhost%253A8080%252Flogin%252Foauth2%252Fcode%252Fgithub%26response_type%3Dcode%26scope%3Dread%253Auser%26state%3DiwUAuCEzmtmJ0tek6TnmaHWN3pkQEqVqxDfZPndp_2Y%253D
브라우저 콘솔로 네트워크 흐름을 보면 아래와 같다.
- http://localhost:8080/
- http://localhost:8080/oauth2/authorization/github
- https://github.com/login/oauth/authorize?response_type=code&client_id=be4d2d061d05e9aed30a&scope=read:user&state=iwUAuCEzmtmJ0tek6TnmaHWN3pkQEqVqxDfZPndp_2Y%3D&redirect_uri=http://localhost:8080/login/oauth2/code/github
승인 코드 그랜트 유형으로 인증 요청 수행 에 나온 것처럼 이 URL 로 사용자를 리디렉션한다.response_type=code client_id=be4d2d061d05e9aed30a scope=read:user state=iwUAuCEzmtmJ0tek6TnmaHWN3pkQEqVqxDfZPndp_2Y%3D redirect_uri=http://localhost:8080/login/oauth2/code/github - https://github.com/login?client_id=be4d2d061d05e9aed30a&return_to=%2Flogin%2Foauth%2Fauthorize%3Fclient_id%3Dbe4d2d061d05e9aed30a%26redirect_uri%3Dhttp%253A%252F%252Flocalhost%253A8080%252Flogin%252Foauth2%252Fcode%252Fgithub%26response_type%3Dcode%26scope%3Dread%253Auser%26state%3DiwUAuCEzmtmJ0tek6TnmaHWN3pkQEqVqxDfZPndp_2Y%253D
client_id=be4d2d061d05e9aed30a
return_to=%2Flogin%2Foauth%2Fauthorize%3Fclient_id%3Dbe4d2d061d05e9aed30a%26redirect_uri%3Dhttp%253A%252F%252Flocalhost%253A8080%252Flogin%252Foauth2%252Fcode%252Fgithub%26response_type%3Dcode%26scope%3Dread%253Auser%26state%3DiwUAuCEzmtmJ0tek6TnmaHWN3pkQEqVqxDfZPndp_2Y%253D
이제 로그인을 한 후 네트워크의 흐름을 보면 아래와 같다.
- https://github.com/login/oauth/authorize?client_id=be4d2d061d05e9aed30a&redirect_uri=http%3A%2F%2Flocalhost%3A8080%2Flogin%2Foauth2%2Fcode%2Fgithub&response_type=code&scope=read%3Auser&state=iwUAuCEzmtmJ0tek6TnmaHWN3pkQEqVqxDfZPndp_2Y%3D
client_id=be4d2d061d05e9aed30a redirect_uri=http%3A%2F%2Flocalhost%3A8080%2Flogin%2Foauth2%2Fcode%2Fgithub response_type=code scope=read%3Auser state=iwUAuCEzmtmJ0tek6TnmaHWN3pkQEqVqxDfZPndp_2Y%3D - http://localhost:8080/login/oauth2/code/github?code=511bfbb98e1836cfc4af&state=iwUAuCEzmtmJ0tek6TnmaHWN3pkQEqVqxDfZPndp_2Y%3D
브라우저에서 토큰 엔드포인트를 호출하는 부분은 애플이케이션에서 직접 수행되므로 확인할 수 없지만 엔드포인트 호출 시 남겼던 사용자 세부 정보 로그가 출력되는 것으로 애플리케이션이 액세스 토큰을 얻는 데 성공한 것을 알 수 있다.
token: OAuth2AuthenticationToken [Principal=Name: [1111111], Granted Authorities: [[OAUTH2_USER, SCOPE_read:user]], User Attributes: [{login=깃헙아이디, id=11111, node_id=fdasfdasf, avatar_url=https://avatars.githubusercontent.com/u/1111111?v=4, gravatar_id=, url=https://api.github.com/users/깃헙아이디, html_url=https://github.com/깃헙아이디, followers_url=https://api.github.com/users/깃헙아이디/followers, following_url=https://api.github.com/users/깃헙아이디/following{/other_user}, gists_url=https://api.github.com/users/깃헙아이디/gists{/gist_id}, starred_url=https://api.github.com/users/깃헙아이디/starred{/owner}{/repo}, subscriptions_url=https://api.github.com/users/깃헙아이디/subscriptions, organizations_url=https://api.github.com/users/깃헙아이디/orgs, repos_url=https://api.github.com/users/깃헙아이디/repos, events_url=https://api.github.com/users/깃헙아이디/events{/privacy}, received_events_url=https://api.github.com/users/깃헙아이디/received_events, type=User, site_admin=false, name=깃헙아이디, company=null, blog=, location=seoul, email=null, hireable=null, bio=null, twitter_username=null, public_repos=23, public_gists=1, followers=6, following=2, created_at=2016-04-15T07:56:57Z, updated_at=2024-02-25T07:21:06Z, private_gists=1, total_private_repos=20, owned_private_repos=20, disk_usage=317123, collaborators=0, two_factor_authentication=true, plan={name=free, space=976562499, collaborators=0, private_repos=10000}}], Credentials=[PROTECTED], Authenticated=true, Details=WebAuthenticationDetails [RemoteIpAddress=0:0:0:0:0:0:0:1, SessionId=B1ACB6A51C45422449232C4BFB748749], Granted Authorities=[OAUTH2_USER, SCOPE_read:user]]
principal: Name: [1111111], Granted Authorities: [[OAUTH2_USER, SCOPE_read:user]], User Attributes: [{login=깃헙아이디, id=1111111, node_id=fdsafds, avatar_url=https://avatars.githubusercontent.com/u/fdsafd?v=4, gravatar_id=, url=https://api.github.com/users/깃헙아이디, html_url=https://github.com/깃헙아이디, followers_url=https://api.github.com/users/깃헙아이디/followers, following_url=https://api.github.com/users/깃헙아이디/following{/other_user}, gists_url=https://api.github.com/users/깃헙아이디/gists{/gist_id}, starred_url=https://api.github.com/users/깃헙아이디/starred{/owner}{/repo}, subscriptions_url=https://api.github.com/users/깃헙아이디/subscriptions, organizations_url=https://api.github.com/users/깃헙아이디/orgs, repos_url=https://api.github.com/users/깃헙아이디/repos, events_url=https://api.github.com/users/깃헙아이디/events{/privacy}, received_events_url=https://api.github.com/users/깃헙아이디/received_events, type=User, site_admin=false, name=깃헙아이디, company=null, blog=, location=seoul, email=null, hireable=null, bio=null, twitter_username=null, public_repos=23, public_gists=1, followers=6, following=2, created_at=2016-04-15T07:56:57Z, updated_at=2024-02-25T07:21:06Z, private_gists=1, total_private_repos=20, owned_private_repos=20, disk_usage=317123, collaborators=0, two_factor_authentication=true, plan={name=free, space=976562499, collaborators=0, private_repos=10000}}]

securityContext getAuthentication: OAuth2AuthenticationToken [Principal=Name: [1111111], Granted Authorities: [[OAUTH2_USER, SCOPE_read:user]], User Attributes: [{login=깃헙아이디, id=111111, node_id=fdasfdasf, avatar_url=https://avatars.githubusercontent.com/u/1111111?v=4, gravatar_id=, url=https://api.github.com/users/깃헙아이디, html_url=https://github.com/깃헙아이디, followers_url=https://api.github.com/users/깃헙아이디/followers, following_url=https://api.github.com/users/깃헙아이디/following{/other_user}, gists_url=https://api.github.com/users/깃헙아이디/gists{/gist_id}, starred_url=https://api.github.com/users/깃헙아이디/starred{/owner}{/repo}, subscriptions_url=https://api.github.com/users/깃헙아이디/subscriptions, organizations_url=https://api.github.com/users/깃헙아이디/orgs, repos_url=https://api.github.com/users/깃헙아이디/repos, events_url=https://api.github.com/users/깃헙아이디/events{/privacy}, received_events_url=https://api.github.com/users/깃헙아이디/received_events, type=User, site_admin=false, name=깃헙아이디, company=null, blog=, location=seoul, email=null, hireable=null, bio=null, twitter_username=null, public_repos=23, public_gists=1, followers=6, following=2, created_at=2016-04-15T07:56:57Z, updated_at=2024-02-25T07:21:06Z, private_gists=1, total_private_repos=20, owned_private_repos=20, disk_usage=317123, collaborators=0, two_factor_authentication=true, plan={name=free, space=976562499, collaborators=0, private_repos=10000}}], Credentials=[PROTECTED], Authenticated=true, Details=WebAuthenticationDetails [RemoteIpAddress=0:0:0:0:0:0:0:1, SessionId=B1ACB6A51C45422449232C4BFB748749], Granted Authorities=[OAUTH2_USER, SCOPE_read:user]]
securityContext principal: Name: [1111111], Granted Authorities: [[OAUTH2_USER, SCOPE_read:user]], User Attributes: [{login=깃헙아이디, id=1111111, node_id=fdsafd, avatar_url=https://avatars.githubusercontent.com/u/fdsaf?v=4, gravatar_id=, url=https://api.github.com/users/깃헙아이디, html_url=https://github.com/깃헙아이디, followers_url=https://api.github.com/users/깃헙아이디/followers, following_url=https://api.github.com/users/깃헙아이디/following{/other_user}, gists_url=https://api.github.com/users/깃헙아이디/gists{/gist_id}, starred_url=https://api.github.com/users/깃헙아이디/starred{/owner}{/repo}, subscriptions_url=https://api.github.com/users/깃헙아이디/subscriptions, organizations_url=https://api.github.com/users/깃헙아이디/orgs, repos_url=https://api.github.com/users/깃헙아이디/repos, events_url=https://api.github.com/users/깃헙아이디/events{/privacy}, received_events_url=https://api.github.com/users/깃헙아이디/received_events, type=User, site_admin=false, name=깃헙아이디, company=null, blog=, location=seoul, email=null, hireable=null, bio=null, twitter_username=null, public_repos=23, public_gists=1, followers=6, following=2, created_at=2016-04-15T07:56:57Z, updated_at=2024-02-25T07:21:06Z, private_gists=1, total_private_repos=20, owned_private_repos=20, disk_usage=317123, collaborators=0, two_factor_authentication=true, plan={name=free, space=976562499, collaborators=0, private_repos=10000}}]
마치며…
- 스프링 시큐리티는
ClientRegistration의 인스턴스를 이용해서 권한 부여 서버에서 클라이언트의 등록을 나타냄 - 스프링 시큐리티 OAuth 2 구현에서 특정 클라이언트 등록을 찾는 책임이 있는 구성 요소를
ClientRegistrationRepository라고 함 - 스프링 시큐리티로 OAuth 2 클라이언트를 구현할 때는 사용 가능한
ClientRegistration이 하나 이상 있는ClientRegistrationRepository객체를 정의해야 함
참고 사이트 & 함께 보면 좋은 사이트
본 포스트는 로렌티우 스필카 저자의 스프링 시큐리티 인 액션을 기반으로 스터디하며 정리한 내용들입니다.
- 스프링 시큐리티 인 액션
- Configuration Migrations
- Spring Boot 3.x + Security 6.x 기본 설정 및 변화
- 스프링 부트 2.0에서 3.0 스프링 시큐리티 마이그레이션 (변경점)
- GitHub 에 클라이언트 등록
- GitHub Oauth 앱 권한부여 docs
