Node.js - mongoDB, mongoose
in DEV on Javascript Nodejs Mongodb Mongoose
이 포스트는 몽고디비, 그리고 몽고디비와 노드를 연결시켜주는 라이브러리인 몽구스에 대해 알아본다.
소스는 assu10/nodejs.git 에 있습니다.
- 프로젝트 세팅
- NoSQL vs SQL
- 몽고디비 설치
- 컴퍼스 설치 및 커넥션 생성
- 데이터베이스, collection 생성
- CRUD 작업
- 몽구스
- 몽고디비 연결
- 스키마 정의
- 쿼리 수행
1. 프로젝트 세팅
> npm init --y
> npm i -D eslint eslint-config-prettier eslint-plugin-prettier nodemon
> npm i -D prettier --save-exact
> npm i express morgan nunjucks
package.json
{
  "name": "chap08",
  "version": "1.0.0",
  "description": "",
  "main": "index.js",
  "scripts": {
    "start": "nodemon app"
  },
  "keywords": [

  ],
  "author": "",
  "license": "ISC",
  "devDependencies": {
    "eslint": "^8.5.0",
    "eslint-config-prettier": "^8.3.0",
    "eslint-plugin-prettier": "^4.0.0",
    "nodemon": "^2.0.15",
    "prettier": "2.5.1"
  },
  "dependencies": {
    "express": "^4.17.2",
    "mongoose": "^6.1.4",
    "morgan": "^1.10.0",
    "nunjucks": "^3.2.3"
  }
}
.eslintrc.json
{
  "env": {
    "browser": true,
    "es2021": true,
    "node": true
  },
  "extends": [
    "eslint:recommended",
    "plugin:prettier/recommended"
  ],
  "parserOptions": {
    "ecmaVersion": 13,
    "sourceType": "module"
  },
  "rules": {
  }
}
.prettierrc.js
module.exports = {
    singleQuote: true,
    // 문자열은 따옴표로 formatting
    semi: true,
    //코드 마지막에 세미콜른이 있게 formatting
    useTabs: false,
    //탭의 사용을 금하고 스페이스바 사용으로 대체하게 formatting
    tabWidth: 2,
    // 들여쓰기 너비는 2칸
    trailingComma: 'all',
    // 자세한 설명은 구글링이 짱이긴하나 객체나 배열 키:값 뒤에 항상 콤마를 붙히도록 	  	//formatting
    printWidth: 80,
    // 코드 한줄이 maximum 80칸
    arrowParens: 'avoid',
    // 화살표 함수가 하나의 매개변수를 받을 때 괄호를 생략하게 formatting
    endOfLine: "auto"
};
2. NoSQL vs SQL
몽고디비의 특징 중 하나는 자바스크립트 문법을 사용한다는 것이다.
| SQL(MySQL) | NoSQL(몽고디비) |
|---|---|
| 규칙에 맞는 데이터 입력 | 자유로운 데이터 입력 |
| 테이블 간 join 지원 | collection 간 join 미지원 |
| 안정성, 일관성 | 확장성, 가용성 |
| 테이블, 로우, 컬럼 | collection, document, 필드 |
NoSQL 에는 고정된 테이블이 없다.
테이블에 상응하는 collection 개념이 있지만 컬럼을 따로 정의하지는 않는다.
예를 들어 MySQL 은 user 테이블 생성 시 name, age 등의 컬럼과 자료형 등을 정의하지만,
몽고디비는 그냥 user collection 을 만들고 끝이다.
user collection 에는 어떠한 데이터든 들어갈 수 있다.
로우에 해당하는 어떤 document 에는 name, age 가 들어가고, 어떤 document 에는 name, comment 가 들어갈 수 있다.
몽고디비에는 join 기능이 없다.
join 을 흉내낼 수는 있지만 항상 가능한 것은 아니다.
이러한 단점들에도 불구하고 몽고디비를 사용하는 이유는 확장성 과 가용성 때문이다.
데이터의 일관성을 보장해주는 기능이 약한 대신 데이터를 빠르게 넣을 수 있고 여러 서버에 데이터를 분산 할 수 있다.
용어도 테이블 = collection, 로우 = document, 컬럼 = 필드 라고 부른다.
빅데이터, 메시징, 세션 관리 등에는 확장성과 가용성을 위해 몽고디비를 사용할 수 있다.
3. 몽고디비 설치
설치
> brew tap mongodb/brew
> brew install mongodb-community
Mac 은 /usr/local/var/mongodb 에 데이터가 저장된다.
실행
> brew services start mongodb-community
==> Successfully started `mongodb-community` (label: homebrew.mxcl.mongodb-community)
몽고디비 프롬프트 접속
> mongo
MongoDB shell version v5.0.4
connecting to: mongodb://127.0.0.1:27017/?compressors=disabled&gssapiServiceName=mongodb
Implicit session: session { "id" : UUID("365e20a0-a9b9-49a1-9e7e-a710b8603e72") }
MongoDB server version: 5.0.4
================
Warning: the "mongo" shell has been superseded by "mongosh",
which delivers improved usability and compatibility.The "mongo" shell has been deprecated and will be removed in
an upcoming release.
For installation instructions, see
https://docs.mongodb.com/mongodb-shell/install/
================
Welcome to the MongoDB shell.
For interactive help, type "help".
For more comprehensive documentation, see
	https://docs.mongodb.com/
Questions? Try the MongoDB Developer Community Forums
	https://community.mongodb.com
---
The server generated these startup warnings when booting:
        2021-12-31T21:59:02.965+09:00: Access control is not enabled for the database. Read and write access to data and configuration is unrestricted
---
---
        Enable MongoDB's free cloud-based monitoring service, which will then receive and display
        metrics about your deployment (disk utilization, CPU, operation statistics, etc).

        The monitoring data will be available on a MongoDB website with a unique URL accessible to you
        and anyone you share the URL with. MongoDB may use this information to make product
        improvements and to suggest MongoDB products and deployment options to you.

        To enable free monitoring, run the following command: db.enableFreeMonitoring()
        To permanently disable this reminder, run the following command: db.disableFreeMonitoring()
---
>
콘솔에 mongo 라고 입력했을 때 프롬프트가 > 로 바뀌면 접속 성공이다.
지금은 누구나 몽고디비에 접속이 가능하므로 관리자 계정을 추가한다.
> use admin
switched to db admin
> db.createUser( {user: 'assu', pwd: '1234', roles: ['root'] })
Successfully added user: { "user" : "assu", "roles" : [ "root" ] }
Ctrl+C 를 눌러 프롬프트 종료 후 몽고디비가 인증을 사용하도록 해보자.
> brew services stop mongodb-community
Stopping `mongodb-community`... (might take a while)
==> Successfully stopped `mongodb-community` (label: homebrew.mxcl.mongodb-community)

> vi /usr/local/etc/mongod.conf
/usr/local/etc/mongod.conf
...

security:
  authorization: enabled
이제 mongodb 를 실행하고 mongo admin -u [이름] -p [비밀번호] 명령어로 접속한다.
> brew services start mongodb-community
==> Successfully started `mongodb-community` (label: homebrew.mxcl.mongodb-community)

> mongo admin -u assu -p 1234
4. 컴퍼스 설치 및 커넥션 생성
몽고디비는 관리 도구로 컴퍼스를 제공한다.
컴퍼스를 사용하면 GUI 를 통해 데이터를 시각적으로 관리할 수 있다.
> brew install --cask mongodb-compass
설치 후 launchpad 에 들어가면 mongoDB Compass 가 설치되어 있을 것이다.
화면 우측 상단의 Fill in connection fields individually 를 통해 정보 설정 후 접속한다.
기본적으로 admin, config, local 데이터베이스가 생성되어 있다.
5. 데이터베이스, collection 생성
이제 몽고디비 실행 및 프롬프트에 접속하여 데이터베이스, collection 을 생성한다.
> brew services start mongodb-community
> mongo admin -u assu -p 1234
DB를 만드는 명령어는 use [데이터베이스명] 이고,
DB 목록을 확인하는 명령어는 show dbs 이다.
> use nodejs
switched to db nodejs

> show dbs
admin   0.000GB
config  0.000GB
local   0.000GB

> db
nodejs
데이터를 최소 한 개 이상 넣어야 목록에 표시되므로 show dbs 를 통한 명령어로는 방금 생성한 nodejs 가 보이지 않는다.
현재 사용중인 DB 를 확인하는 명령어는 db 이다.
document 를 넣는 순간 collection 도 자동으로 생성되므로 collection 은 따로 생성하지 않아도 되지만 아래처럼 직접 collection 을 생성하는 명령어도 있긴 하다.
> db.createCollection('users')
{ "ok" : 1 }

> db.createCollection('comments')
{ "ok" : 1 }

> show collections
comments
users
6. CRUD 작업
collection 에 컬럼을 정의하지 않아도 collection 에는 아무 데이터나 넣을 수 있다.
몽고디비는 기본적으로 자바스크립트 문법을 사용하므로 자바스크립트의 자료형을 따르는데 추가로 아래와 같은 자료형이 더 있다.
Binary Data, ObjectId, Int, Long, Decimal, Timestamp, JavaScript 등이 있는데 Binary Data, ObjectId, Timestamp 외엔 잘 사용되지 않는다.
참고로 Undefined 와 Symbol 은 몽고디비에서 자료형으로 사용되지 않는다.
ObjectId 는 고유한 값을 갖기 때문에 document 조회 시 사용하며, MySQL 에서 기본키와 같은 역할을 한다.
6.1. 데이터 생성
생성은 db.컬렉션명.save(document) 로 document 를 생성할 수 있다.
생성
> db.users.save({name: 'assu', age: 20, married: false, comment: '안녕? 나야 나', createdAt: new Date() })
WriteResult({ "nInserted" : 1 })

> db.users.save({name: '재훈', age: 21, married: false, comment: '안녕? 재훈이야', createdAt: new Date() })
WriteResult({ "nInserted" : 1 })
이제 comments collection 에도 데이터를 넣어볼텐데 그러려면 위의 assu 의 ObjectId 를 먼저 조회해야 한다.
ObjectId 조회 후 데이터 생성
> db.users.find({ name: 'assu' })
{ "_id" : ObjectId("61d002b021d524d5ca7fa3ca"), "name" : "assu", "age" : 20, "married" : false, "comment" : "안녕? 나야 나", "createdAt" : ISODate("2022-01-01T07:28:48.670Z") }

# 또는
> db.users.find({ name: 'assu'}, {_id: 1 })
{ "_id" : ObjectId("61d002b021d524d5ca7fa3ca") }

> db.comments.save({ commenter: ObjectId('61d002b021d524d5ca7fa3ca'), comment: '첫번째 댓글', createdAt: new Date() })
WriteResult({ "nInserted" : 1 })
6.2. 데이터 조회
collection 내의 모든 document 조회 - find({})
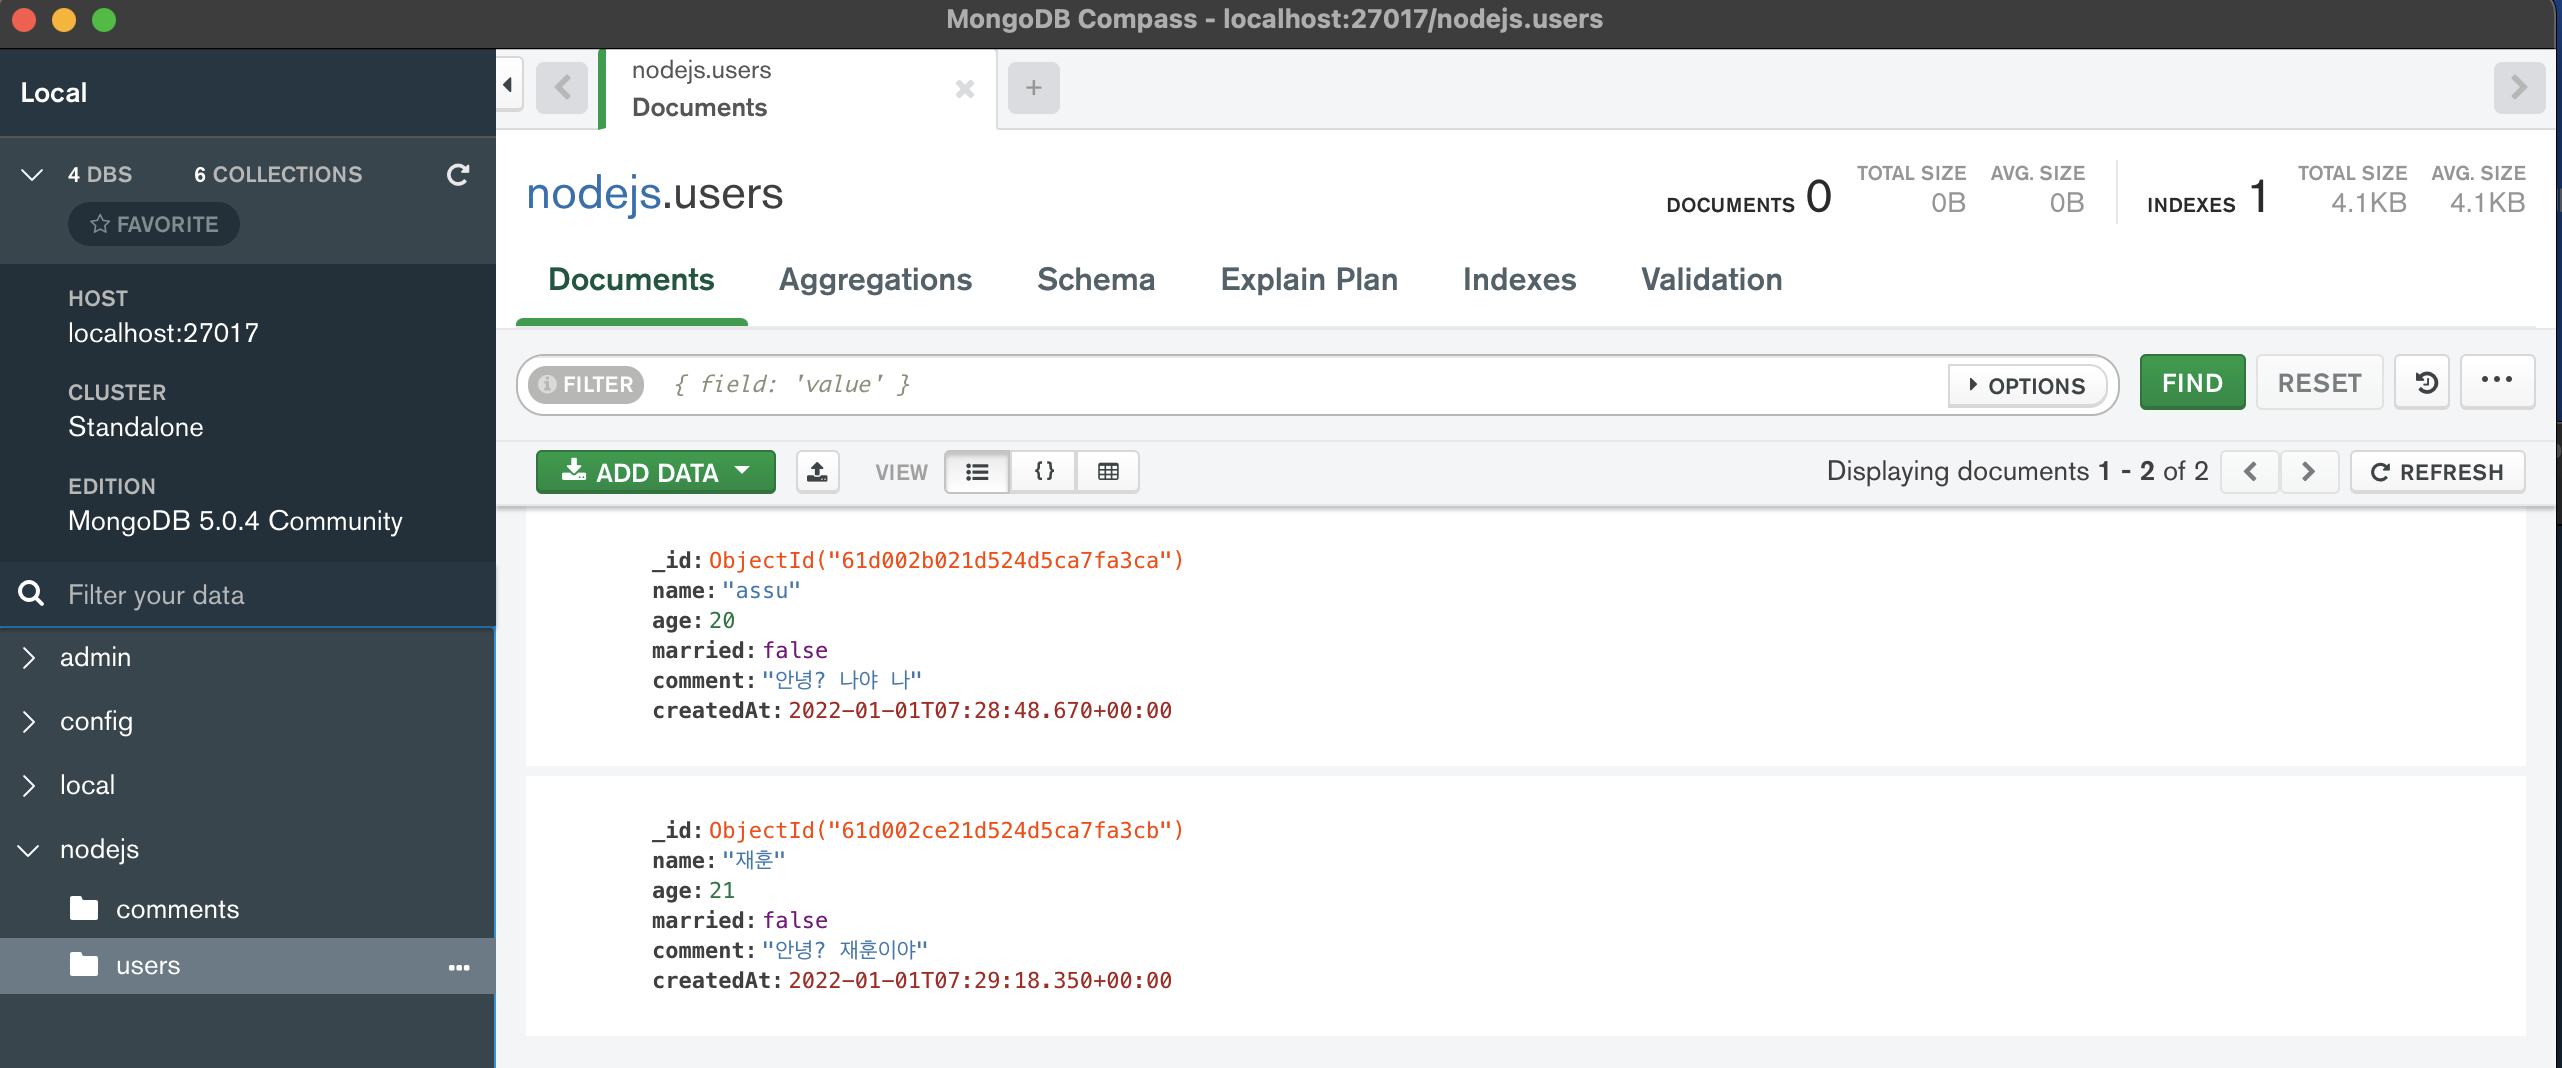
> db.users.find({})
{ "_id" : ObjectId("61d002b021d524d5ca7fa3ca"), "name" : "assu", "age" : 20, "married" : false, "comment" : "안녕? 나야 나", "createdAt" : ISODate("2022-01-01T07:28:48.670Z") }
{ "_id" : ObjectId("61d002ce21d524d5ca7fa3cb"), "name" : "재훈", "age" : 21, "married" : false, "comment" : "안녕? 재훈이야", "createdAt" : ISODate("2022-01-01T07:29:18.350Z") }
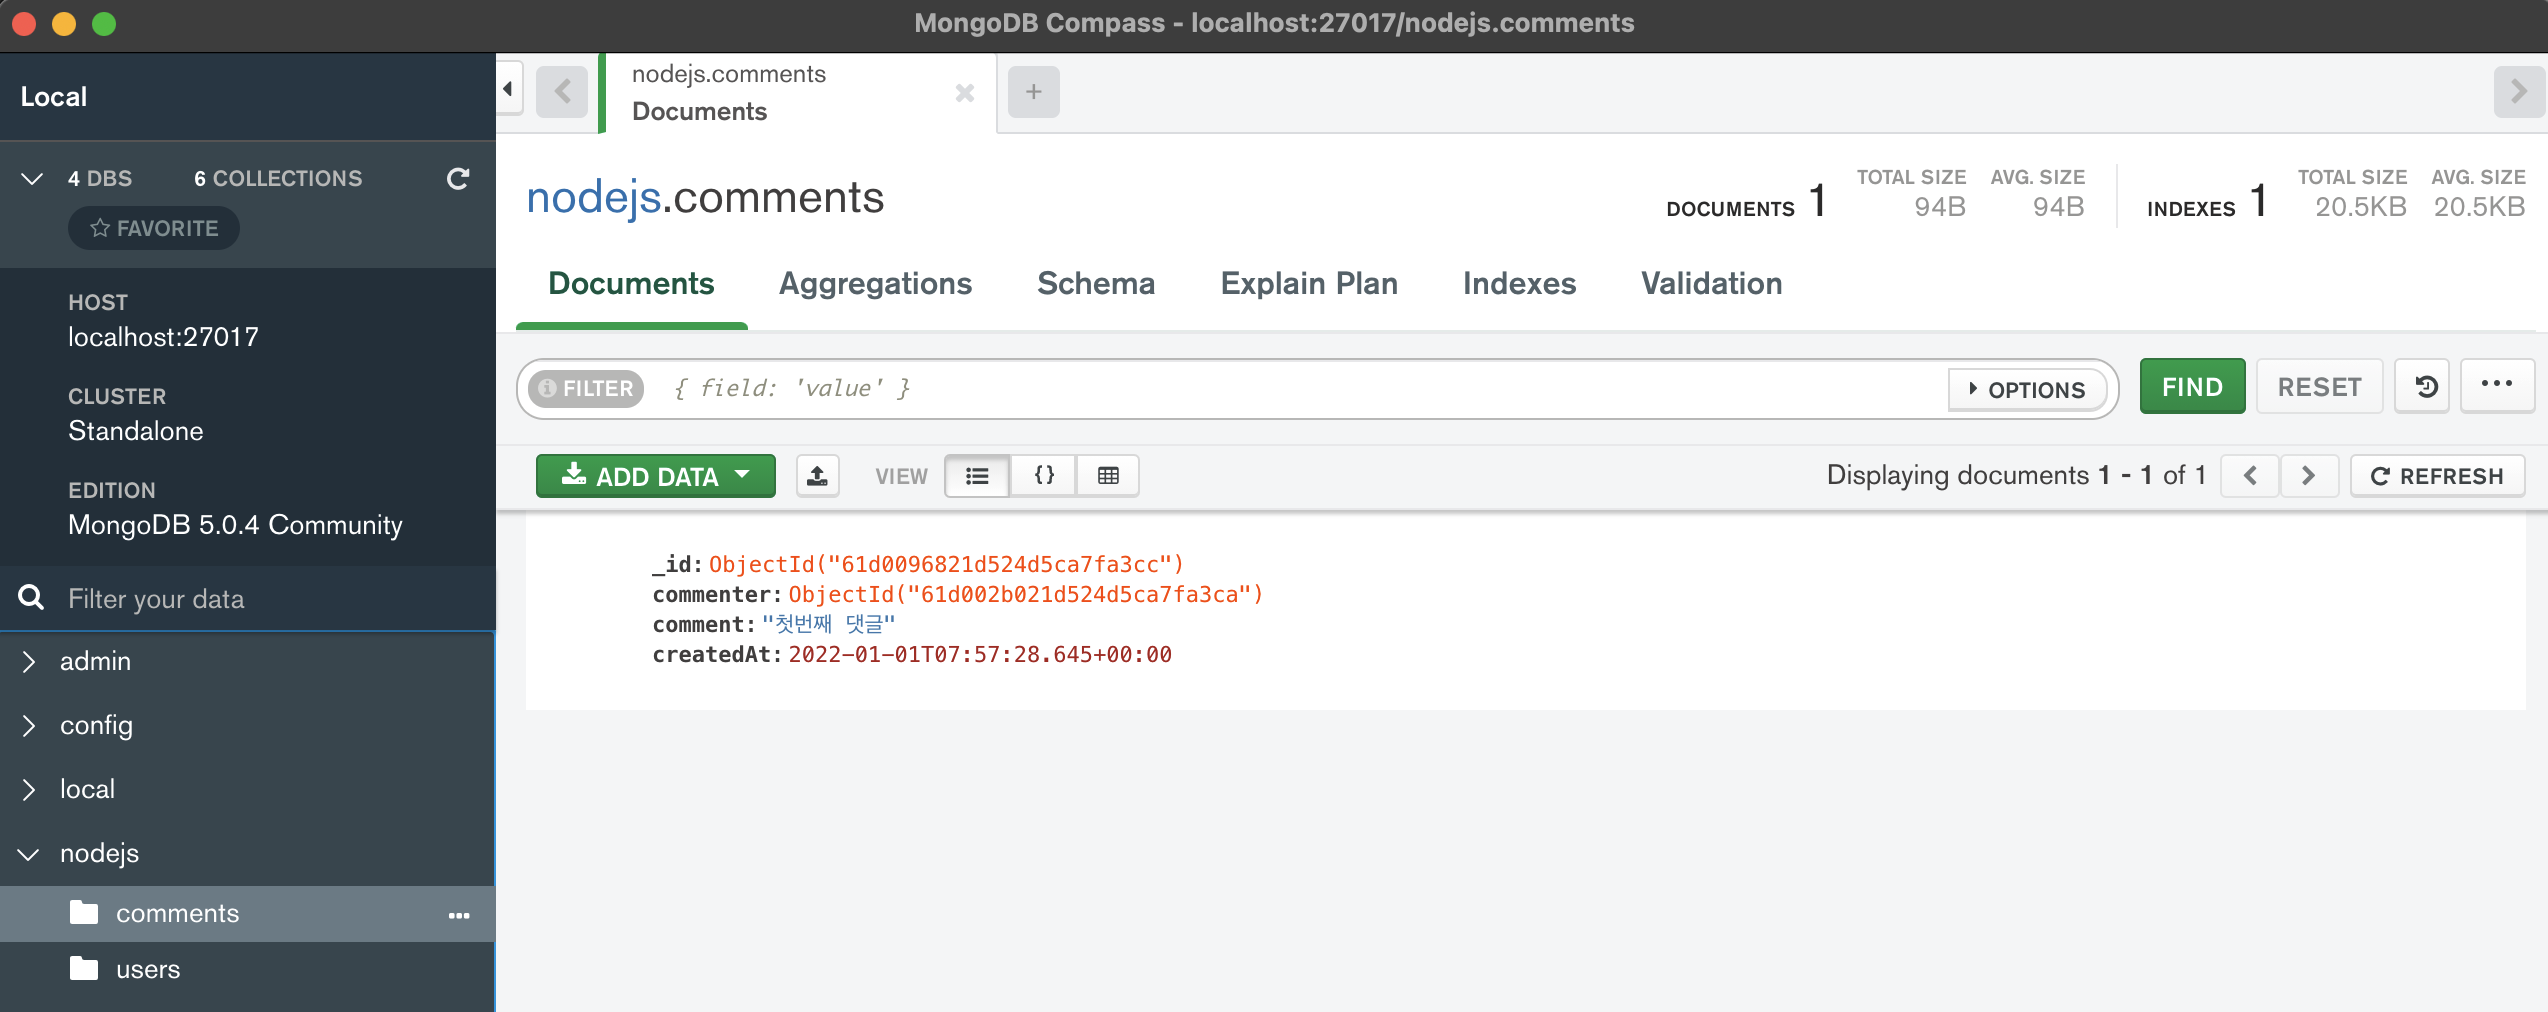
> db.comments.find({})
{ "_id" : ObjectId("61d0096821d524d5ca7fa3cc"), "commenter" : ObjectId("61d002b021d524d5ca7fa3ca"), "comment" : "첫번째 댓글", "createdAt" : ISODate("2022-01-01T07:57:28.645Z") }
특정 필드만 조회 시 - find 메서드의 두 번째 인수에 조회할 필드 설정
_id 는 기본적으로 가져오게 되어있으므로 0 또는 false 를 넣어 조회하지 않도록 한다.
> db.users.find({}, { _id: 0, name: 1, married: 1 })
{ "name" : "assu", "married" : false }
{ "name" : "재훈", "married" : false }

> db.users.find({}, { _id: false, name: true, married: true })
{ "name" : "assu", "married" : false }
{ "name" : "재훈", "married" : false }
조회 시 조건을 줄 때 - find 메서드의 첫 번째 인수에 조건 설정
자주 사용되는 연산자로는 아래가 있다.
$gt: 초과$gte: 이상$lt: 미만$lte: 이하$ne: 같지 않음$or: 또는$in: 배열 요소 중 하나
몽고디비에서 OR 연산은 $or 을 사용한다.
아래는 20세 초과이고 married 가 true 인 데이터를 조회하는 쿼리이다.
> db.users.find({ age: { $gt: 20 }, married: true }, { _id: false, name: true, married: true })

> db.users.find({ age: { $gt: 20 }, married: false }, { _id: false, name: true, married: true })
{ "name" : "재훈", "married" : false }
아래는 20세 초과이거나 married 가 true 인 데이터를 조회하는 쿼리이다.
> db.users.find({ $or: [{ age: { $gt: 20} }, { married: false }] }, { _id: false, name: true, age: true })
{ "name" : "assu", "age" : 20 }
{ "name" : "재훈", "age" : 21 }
정렬 - sort 메서드 사용
-1 은 내림차순, 1 은 오름차순이다.
> db.users.find({}, { _id: false, name: true, age: true}).sort({ age: -1 })
{ "name" : "재훈", "age" : 21 }
{ "name" : "assu", "age" : 20 }
limit - limit 메서드 사용
> db.users.find({}, { _id: false, name: true, age: true}).sort({ age: -1 }).limit(1)
{ "name" : "재훈", "age" : 21 }
offset 기능 - skip 메서드 사용
> db.users.find({}, { _id: false, name: true, age: true}).sort({ age: -1 }).limit(1).skip(1)
{ "name" : "assu", "age" : 20 }
6.3. 데이터 수정
> db.users.update({ name: '재훈'}, { $set: { comment: '수정할게요'} })
WriteResult({ "nMatched" : 1, "nUpserted" : 0, "nModified" : 1 })
첫 번째 객체는 수정할 document 를 지정하는 객체이고, 두 번째 객체는 수정할 내용을 입력하는 객체이다.
$set 연산자를 통해 어떤 필드를 수정할지 정하는데 이 연산자를 사용하지 않고 일반 객체를 넣으면 document 가 통째로 두 번째 객체로 수정되니 유의해야 한다.
수정이 성공하면 첫 번째 객체에 해당하는 document 의 수(nMatched)와 수정된 document 의 수(nModified) 가 리턴된다.
6.4. 데이터 삭제
> db.users.remove({ name: '재훈' })
WriteResult({ "nRemoved" : 1 })
지금까지 몽고디비에 대해 알아보았다.
이제 노드와 몽고디비를 연동해줘야 하는데 연동 뿐 아니라 쿼리까지 만들어주는 라이브러리인 몽구스에 대해 알아본다.
몽고디비 자체로도 자바스크립트 쿼리를 사용하지만, 몽구스를 사용하면 더 쉽게 사용이 가능하다.
7. 몽구스
MySQL 에 시퀄라이즈가 있다면 몽고디비에는 몽구스 (mongoose) 가 있다.

몽구스는 시퀄라이즈와 달리 ODB (Object Document Mapping) 이라고 불린다.
몽고디비는 릴레이션이 아니라 document 를 사용하므로 ORM 이 아니라 ODM 이다.
몽고디비 자체가 이미 자바스크립트인데도 굳이 자바스크립트 객체와 매핑하는 이유는 바로 몽고디비에 없어서 불편한 기능들을 몽구스가 보완해주기 때문이다.
- 스키마
- 몽고디비에는 테이블이 없어서 자유롭게 데이터를 넣을 수 있지만 때로는 이 자유로움이 불편함을 초래한다.
실수로 잘못된 자료형의 데이터를 넣거나, 다른 document 에는 없는 필드의 데이터를 넣을 수도 있다.
몽구스는 몽고디비에 데이터를 넣기 전에 노드 서버단에서 데이터를 한번 필터링하는 역할을 해준다.
- 몽고디비에는 테이블이 없어서 자유롭게 데이터를 넣을 수 있지만 때로는 이 자유로움이 불편함을 초래한다.
- populate
- MySQL 의 JOIN 기능을 보완해주는 기능이다.
쿼리 한 번에 데이터를 합쳐서 가져오는 것은 아니지만, 이 작업을 개발자가 직접 하지 않아도 되므로 편리하다.
- MySQL 의 JOIN 기능을 보완해주는 기능이다.
- ES2015 프로미스 문법
- 강력하고 가독성이 높은 쿼리 빌더 지원
이제 몽구스를 설치해보자.
> npm i mongoose
7.1. 몽고디비 연결
이제 몽구스를 통해 노드랑 몽고디비를 연결해보자.
몽고디비 주소 형식은 mongodb://[username:password@]host[:port][/database][?options] 와 같다.
우선 schemas 폴더 생성 후 폴더 안에 아래와 같은 index.js 파일을 작성한다.
/schemas/index.js
const mongoose = require('mongoose');

const connect = () => {
  // 개발 환경일때만 콘솔을 통해 몽구스가 생성하는 쿼리 내용 확인
  if (process.env.NODE_ENV !== 'production') {
    mongoose.set('debug', true);
  }

  // 몽구스와 몽고디비 연결
  // 접속을 시도하는 주소의 데이터베이스는 admin 이지만 실제 사용할 데이터베이스는 nodejs 이므로 dbName 사용
  mongoose.connect(
    'mongodb://assu:1234@localhost:27017/admin',
    {
      dbName: 'nodejs',
      useNewUrlParser: true,
    },
    error => {
      if (error) {
        console.error('몽고디비 연결 에러', error);
      } else {
        console.log('몽고디비 연결 성공');
      }
    },
  );
};

mongoose.connection.on('error', error => {
  console.error('몽고디비 연결 에러', error);
});

mongoose.connection.on('disconnected', () => {
  console.error('몽고디비 연결 끊어짐, 연결 재시도...');
  connect();
});

module.exports = connect;
app.js
const express = require('express');
const path = require('path');
const morgan = require('morgan');
const nunjucks = require('nunjucks');

const connect = require('./schemas');

const app = express();
app.set('port', process.env.PORT || 3000);
app.set('view engine', 'html');
nunjucks.configure('views', {
  express: app,
  watch: true,
});
connect();

app.use(morgan('dev'));
app.use(express.static(path.join(__dirname, 'public')));
app.use(express.json());
app.use(express.urlencoded({ extended: false }));

app.use((req, res, next) => {
  const error = new Error(`${req.method} ${req.url} 라우터가 없습니다.`);
  error.status = 404;
  next(error);
});

app.use((err, req, res, next) => {
  res.locals.message = err.message;
  res.locals.error = process.env.NODE_ENV !== 'production' ? err : {};
  res.status(err.status || 500);
  res.render('error');
});

app.listen(app.get('port'), () => {
  console.log(app.get('port'), '번 포트에서 대기 중');
});
7.2. 스키마 정의
user.js
const mongoose = require('mongoose');

const { Schema } = mongoose;
const userSchema = new Schema({
  name: {
    type: String,
    required: true,
    unique: true,
  },
  age: {
    type: Number,
    required: true,
  },
  married: {
    type: Boolean,
    required: true,
  },
  comment: String,
  createdAt: {
    type: Date,
    default: Date.now,
  },
});

module.exports = mongoose.model('User', userSchema);
몽구스는 _id 를 기본 키로 생성하기 때문에 _id 키는 적어줄 필요가 없다.
몽구스는 String, Number, Date, Buffer, Boolean, Mixed, ObjectId, Array 를 값으로 가질 수 있는데
몽고디비의 자료형과 조금 다르며 편의성을 위해 종류를 줄였다.
comment.js
const mongoose = require('mongoose');

const { Schema } = mongoose;
const {
  Types: { ObjectId },
} = Schema;
const commentSchema = new Schema({
  commenter: {
    type: ObjectId,
    required: true,
    ref: 'User',
  },
  comment: {
    type: String,
    required: true,
  },
  createdAt: {
    type: Date,
    default: Date.now,
  },
});

module.exports = mongoose.model('Comment', commentSchema);
commenter 의 속성을 보면 ref 에 User 값이 있고, 자료형은 ObjectId 이다.
commenter 필드에는 User 스키마의 사용자 ObjectId 가 들어간다는 의미이다.
몽구스는 model 메서드의 첫 번째 인수로 collection 이름을 만든다.
첫 번째 인수가 User 라면 첫 글자를 소문자로 만들고 복수형으로 바꿔서 users collection 을 생성한다.
아래의 경우 comments 라는 collection 이 생성된다.
module.exports = mongoose.model('Comment', commentSchema);
만일 collection 명을 변경하고 싶다면 세 번째 인수로 collection 명을 설정하면 된다.
아래는 comments collection 이 아닌 commentTbl collection 이 생성되는 예시이다.
module.exports = mongoose.model('Comment', commentSchema, 'commentTbl');
7.3. 쿼리 수행
git 에서 views/mongoose.html, views/error.html, public/mongoose.js 을 복사하여 진행하세요.
이제 라우터들을 만들어보자.
routes/index.js
const express = require('express');
const User = require('../schemas/user');

const router = express.Router();

router.get('/', async (req, res, next) => {
  try {
    // 시퀄라이즈는 const users = await User.findAll();
    // 몽고디비에서는 db.users.find({})
    const users = await User.find({});
    res.render('mongoose', { users });
  } catch (err) {
    console.error(err);
    next(err);
  }
});

module.exports = router;
시퀄라이즈, 몽구스, 몽고디비에서 모든 유저를 조회하는 쿼리는 각각 아래와 같다.
// 시퀄라이즈
const users = await User.findAll();

// 몽고디비
db.users.find({})

// 몽구스
const users = await User.find({});
routes/users.js
const express = require('express');
const User = require('../schemas/user');
const Comment = require('../schemas/comment');

const router = express.Router();

router
  .route('/')
  .get(async (req, res, next) => {
    try {
      const users = await User.find({});
      res.json(users);
    } catch (err) {
      console.error(err);
      next(err);
    }
  })
  .post(async (req, res, next) => {
    try {
      const user = await User.create({
        name: req.body.name,
        age: req.body.age,
        married: req.body.married,
      });
      console.log(user);
      res.status(201).json(user);
    } catch (err) {
      console.error(err);
      next(err);
    }
  });

router.get('/:id/comments', async (req, res, next) => {
  try {
    const comments = await Comment.find({ commenter: req.params.id }).populate(
      'commenter',
    );
    console.log(comments);
    res.json(comments);
  } catch (err) {
    console.error(err);
    next(err);
  }
});

module.exports = router;
위 코드에서 댓글 document 를 조회하는 부분을 보자.
// 몽구스
const comments = await Comment.find({ commenter: req.params.id }).populate(
  'commenter',
);

// 시퀄라이즈
const comments = await Comment.findAll({
    include: {
        model: User,
        where: { id: req.params.id },
    },
});
바로 위 몽구스의 실행 쿼리는 아래와 같다.
const comments = await Comment.find({ commenter: req.params.id }).populate(
  'commenter',
);

// 실행 쿼리
[
  {
    _id: new ObjectId("61d0096821d524d5ca7fa3cc"),
    commenter: {
      _id: new ObjectId("61d002b021d524d5ca7fa3ca"),
      name: 'assu',
      age: 20,
      married: false,
      comment: '안녕? 나야 나',
      createdAt: 2022-01-01T07:28:48.670Z
    },
    comment: '첫번째 댓글',
    createdAt: 2022-01-01T07:57:28.645Z
  }
]
Comment 스키마의 comment 필드는 아래와 같이 설정되어 있다.
commenter: {
    type: ObjectId,
    required: true,
    ref: 'User',
  },
먼저 댓글을 쓴 유저의 아이디로 댓글을 조회한 뒤 populate 메서드로 관련되어 있는 collection 의 document 를 불러온다.
Comment 스키마 commenter 필드의 ref 가 User 로 설정되어 있으므로 알아서 users collection 에서 사용자 document 를 찾아 합쳐서 commenter 필드가 사용자 document 로 치환된다.
이제 commenter 필드는 ObjectId 가 아니라 그 ObjectId 를 가진 사용자 document 가 된다.
routes/comments.js
const express = require('express');
const Comment = require('../schemas/comment');

const router = express.Router();

router.post('/', async (req, res, next) => {
  try {
    const comment = await Comment.create({
      commenter: req.body.id,
      comment: req.body.comment,
    });
    console.log('comment', comment);
    const result = await Comment.populate(comment, { path: 'commenter' });
    console.log('result', result);
    res.status(201).json(result);
  } catch (err) {
    console.error(err);
    next(err);
  }
});

router
  .route('/:id')
  .patch(async (req, res, next) => {
    try {
      const result = await Comment.update(
        {
          _id: req.params.id,
        },
        {
          comment: req.body.comment,
        },
      );
      console.log('result', result);
      /* result {
        acknowledged: true,
        modifiedCount: 1,
        upsertedId: null,
        upsertedCount: 0,
        matchedCount: 1
      } */
      res.json(result);
    } catch (err) {
      console.error(err);
      next(err);
    }
  })
  .delete(async (req, res, next) => {
    try {
      const result = await Comment.remove({ _id: req.params.id });
      console.log('result', result);    // result { deletedCount: 1 }
      res.json(result);
    } catch (err) {
      console.error(err);
      next(err);
    }
  });

module.exports = router;
댓글을 등록하는 부분을 보자.
const comment = await Comment.create({
  commenter: req.body.id,
  comment: req.body.comment,
});
console.log('comment', comment);
const result = await Comment.populate(comment, { path: 'commenter' });
console.log('result', result);
Comment.create 메서드로 댓글을 저장한 후 populate 메서드로 프로미스의 결과로 반환된 comment 객체에 다른 collection document 를 불러온다.
path 옵션으로 어떤 필드를 합칠지 설정한 후 합쳐진 결과를 클라이언트로 응답한다.
각각 console.log 는 아래와 같다.
comment {
  commenter: new ObjectId("61d002b021d524d5ca7fa3ca"),
  comment: '세번째 댓글',
  _id: new ObjectId("61d04bf2f94aadf6459a5bc5"),
  createdAt: 2022-01-01T12:41:22.399Z,
  __v: 0
}

result {
  commenter: {
    _id: new ObjectId("61d002b021d524d5ca7fa3ca"),
    name: 'assu',
    age: 20,
    married: false,
    comment: '안녕? 나야 나',
    createdAt: 2022-01-01T07:28:48.670Z
  },
  comment: '세번째 댓글',
  _id: new ObjectId("61d04bf2f94aadf6459a5bc5"),
  createdAt: 2022-01-01T12:41:22.399Z,
  __v: 0
}
document 를 수정하는 PATCH 를 보자.
몽고디비와 다르게 $set 연산자를 사용하지 않아도 기입한 필드만 변경한다.
const result = await Comment.update(
{
  _id: req.params.id,
},
{
  comment: req.body.comment,
},
);
마지막으로 document 를 삭제하는 로직을 보자.
// 몽구스
const result = await Comment.remove({ _id: req.params.id });

// 시퀄라이즈
const result = await Comment.destroy({ where: { id: req.params.id } });
위에서 만든 라우터를 app.js 에 연결한다.
app.js
...

const connect = require('./schemas');
const indexRouter = require('./routes/index');
const usersRouter = require('./routes/users');
const commentsRouter = require('./routes/comments');

...

app.use(morgan('dev'));
app.use(express.static(path.join(__dirname, 'public')));
app.use(express.json());
app.use(express.urlencoded({ extended: false }));

app.use('/', indexRouter);
app.use('/users', usersRouter);
app.use('/comments', commentsRouter);
이제 몽고디비 실행 후 페이지를 확인해보자.
> brew services start mongodb-community

> npm start

[nodemon] 2.0.15
[nodemon] to restart at any time, enter `rs`
[nodemon] watching path(s): *.*
[nodemon] watching extensions: js,mjs,json
[nodemon] starting `node app.js`
3000 번 포트에서 대기 중
몽고디비 연결 성공
Mongoose: users.createIndex({ name: 1 }, { unique: true, background: true })
본 포스트는 조현영 저자의 Node.js 교과서 2판을 기반으로 스터디하며 정리한 내용들입니다.
